The mere thought of installing a wood medicine cabinet with mirror may seem like an overwhelming task. However, with the right step-by-step instructions and guidance, it is possible to achieve an organized bathroom.

Elegance is added through the efficiently designed mirrored cabinets. A well made wooden cabinet enhances your homes functionality and beauty. Focused on construction or finishing touches on your renovation project? This inspiring and incredibly simple DIY project can be completed in five steps.
This guide goes over everything starting from the tools checklist to the flawless installations. We guarantee smooth step-by-step progression with our outline prepared. From use of tools to the medicine cabinet installation, confidence will be built during each step.
- Benefits of Installing a Wooden Medicine Cabinet with Mirror
- Materials and Tools You'll Need
- Step 1: Choose and Prepare the Installation Site
- Step 2: Mark Your Cabinet Placement
- Step 3: Drill Pilot Holes and Insert Anchors
- Step 4: Secure the Cabinet to the Wall
- Step 5: Final Adjustments and Finishing Touches
- Tips for a Smooth Installation
- FAQ About Wooden Medicine Cabinets with Mirrors
- Why Choose Wellfor for Your Medicine Cabinet?
Benefits of Installing a Wooden Medicine Cabinet with Mirror
Why should you bother installing a wood medicine cabinet with mirror? Here are a few great reasons:
- Functional Storage: Keep toiletries, medications, and grooming products neatly stored and easy to access.
- Space-Saving Design: Perfect for small or medium-sized bathrooms, a cabinet adds storage without occupying floor space.
- Style and Elegance: A wooden cabinet with a mirror lends timeless charm to your bathroom decor.
- Dual Purpose: Mirrors make your bathroom appear larger and brighter while serving your everyday grooming needs.
- Property Value: A well-installed cabinet adds practicality and appeal, making your home more attractive to potential buyers.
Materials and Tools You'll Need
Here’s what you need to get started. Gather these tools to make installation straightforward and hassle-free:
Tools
- Stud finder
- Level
- Measuring tape
- Pencil
- Drill and drill bits
- Screwdriver
- Safety glasses
- Masking tape
Materials
- Wood medicine cabinet with mirror (Wellfor is a trusted option to consider)
- Plastic anchors (for drywall installations)
- Screws (wood screws for studs, specific fasteners for other wall types)
- Wall caulk (optional for a seamless finish)
Pro tip: If installing on tiled surfaces, a tile drill bit offers better precision, and masking tape on the drilling area will prevent slipping.
Step 1: Choose and Prepare the Installation Site
Selecting the right spot for your cabinet is pivotal to the installation process.
- Select the Wall Type: Ensure the wall can support the cabinet's weight. Use a stud finder to locate studs behind the drywall.
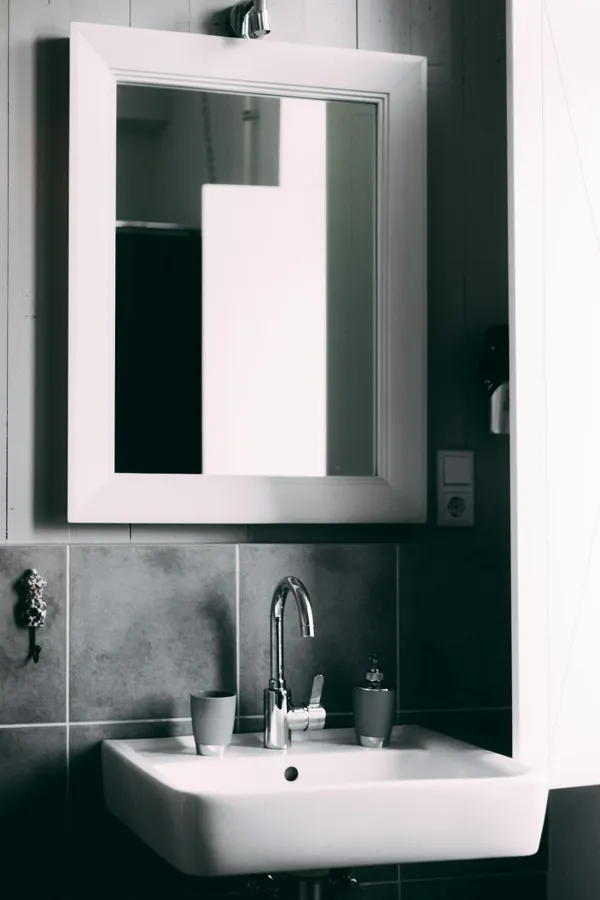
- Height Placement: For optimal use, the bottom of the mirror should be about 3-4 inches above the bathroom sink or faucet.
- Check for Obstructions: Use a multi-purpose detector to avoid drilling into pipes, wires, or vents concealed behind the wall.
- Mark the Central Line: Align the cabinet above the sink or at eye level. Use a pencil and level to lightly draw a vertical line where the cabinet’s center will be placed.
Why this matters: Taking these precautions ensures you install the cabinet safely without damaging existing wall elements.
Step 2: Mark Your Cabinet Placement
Proper placement is essential for achieving a professional look.
- Hold the Cabinet in Place: Enlist a helper to hold the cabinet against the wall while you mark the placement of mounting holes. Use a level to ensure the unit is straight.
- Outline the Cabinet: Trace the cabinet edges onto the wall with a pencil. This will serve as a guide and help align it perfectly during installation.
- Mark Mounting Holes: Open the cabinet door and locate mounting brackets or pre-drilled holes. Mark their exact locations on the wall.
Tips for accuracy: Measure twice to avoid unnecessary holes or readjustments later.
Step 3: Drill Pilot Holes and Insert Anchors
This step provides the foundation for securing the cabinet.
- Drill Pilot Holes: Using the marked points, drill small pilot holes into the wall. If mounting directly into drywall, ensure at least one hole aligns with a stud. For non-stud holes, drill to fit wall anchors.
- Insert Anchors: Push or hammer plastic anchors into the non-stud holes. This will add stability and prevent the cabinet from loosening over time.
- Adjust for Tiles: When drilling into tiles, begin slowly and avoid hammer action. Masking tape over the drill points can prevent cracking or slipping.
Safety note: Always wear safety glasses to protect your eyes from dust and debris.
Step 4: Secure the Cabinet to the Wall
- Position and Align the Cabinet: Carefully align the cabinet with the pilot holes.
- Attach Screws: Use screws to secure the cabinet. Start with the top hole, tightening it slightly, then move on to the rest. Gradually tighten each screw fully until the cabinet is firmly attached.
- Use Wall Brackets: For heavier cabinets, additional wall brackets can provide extra support. These can be mounted at the bottom or sides.
Pro Tip: Avoid overtightening screws, as this could strip the drywall anchors or damage the cabinet.
Step 5: Final Adjustments and Finishing Touches
Once the cabinet is mounted, complete the process with these details:
- Check Alignment: Assess whether the cabinet sits level and flush against the wall. Tighten or adjust as necessary.
- Add Shelves and Hardware: If the cabinet comes with internal shelves, install them now. Add handles or knobs if needed.
- Caulk Edges: For a clean look, apply a bead of caulk where the cabinet meets the wall. Smooth it with a damp finger for a professional appearance.
- Reattach the Door: If you removed the door for easier handling, reattach it now, ensuring the hinges operate smoothly.
Tip for mirrored finishes: Use a glass cleaner to give the mirror a spotless, smudge-free shine.
Tips for a Smooth Installation
- Work with a Partner: Installing a bulky or heavy medicine cabinet is much easier with an extra pair of hands.
- Test Before Finalizing: Check that the cabinet door swings open and closes properly without obstruction.
- Clean Up After Drilling: Use a vacuum or soft brush to clean the area and wipe down the cabinet for a pristine finish.
FAQ About Wooden Medicine Cabinets with Mirrors
Q: Can I install a medicine cabinet on a tiled wall?
A: Yes! Just use the right tile drill bit and be patient to avoid cracks.
Q: Is a recessed cabinet better than a surface-mount cabinet?
A: It depends on your bathroom layout. A recessed option saves space, while surface-mounted cabinets are easier to install.
Q: Where can I buy a solid wood medicine cabinet?
A: Wellfor offers durable and stylish wood medicine cabinets that are highly rated for quality and design.
Q: Do medicine cabinets come with mounting hardware?
A: Most cabinets include screws, anchors, and mounting hardware specific to the cabinet model. Always double-check the packaging.
Why Choose Wellfor for Your Medicine Cabinet?
For a reliable and stylish wood medicine cabinet with mirror, Wellfor stands out as a top brand. Here’s why homeowners trust Wellfor:
- Quality Materials: Wellfor cabinets are crafted using premium solid wood, ensuring durability and longevity.
- Functional Design: Adjustable shelves, versatile storage, and sleek finishes make these cabinets both practical and elegant.
- Easy Installation: Wellfor cabinets come with comprehensive installation instructions and all necessary hardware.
- Affordable Investment: Offering great value without compromising style, Wellfor is a fantastic choice for any budget.
Whether you're completing a bathroom renovation or simply adding functional storage, choosing a Wellfor cabinet is a decision you won't regret.
With these clear and actionable steps, you’re now equipped to install a wood medicine cabinet with mirror in just five steps. Follow this guide and enjoy the seamless blend of practicality and beauty that a well-installed cabinet brings to your bathroom. Take your storage to the next level today!
- Easily Latch and Anchor Your Kids in Place - Toyota Highlander Limited
- The Ultimate Guide to Essential Tools for Cabinet Installation
- Your Family Will Love These 10 Kitchen Renovations - Updated
- How To Upgrade Your Kitchen On A Budget: 6 Useful Tips
- Choosing Between DIY and Contractors for Your Phoenixville, PA Projects