
How To Plan A Whole-Home Heat Pump Upgrade

A whole-home heat pump upgrade can replace separate heating and cooling equipment with a single system that handles both. Before choosing a model, homeowners should learn more about central ducted options and evaluate the home itself, including insulation, airflow, electrical service, and the rooms that are hardest to keep comfortable.
Key Takeaways
- Begin with a complete home assessment, not an equipment search.
- System size should reflect the home's actual heating and cooling loads, not just square footage.
- Ductwork, insulation, airflow, electrical capacity, and controls all affect comfort.
- Detailed proposals make it easier to compare project scope, not just price.
- Rebate requirements and local program rules should be confirmed before ordering equipment.
The best project plan addresses existing comfort problems rather than simply swapping one outdoor unit for another. A well-planned installation can account for the building envelope, duct condition, drainage, thermostat settings, backup heat needs, and the work required to connect the system safely.
Why Planning Comes First
Heat pumps use electricity to move heat, providing cooling by moving heat outside and heating by bringing in available outdoor heat. The basic operation of heat pump systems makes them useful in many home layouts, but the equipment can only perform as well as the surrounding home systems allow.
A rushed replacement can leave the original problem untouched. For example, a weak return-air path, leaky attic ducts, poor insulation, or an incorrectly configured thermostat can contribute to uneven temperatures even after new equipment is installed. Planning should cover heating, cooling, humidity, noise, airflow, and day-to-day operation together.
Start With A Home Comfort Assessment
Document what is not working before meeting with contractors. Note rooms that run too warm or cold, weak airflow at particular vents, summer humidity, drafts, loud equipment, frequent cycling, and unexplained changes in utility bills. These observations give the contractor useful starting points for diagnosis.
Review The Home Itself
- Measure the home's size and note ceiling heights, additions, sun exposure, and floor plan changes.
- Consider insulation levels, window condition, attic access, and obvious air leaks around doors or penetrations.
- Identify where indoor equipment, outdoor equipment, condensate drainage, and service access could be located.
- Record the age and type of existing furnace, air conditioner, boiler, or electric resistance heat.
Choose The Right System Layout
Whole-home heat pumps do not all look or operate the same. The practical choice depends on the home's existing distribution system and the comfort goals for individual spaces.
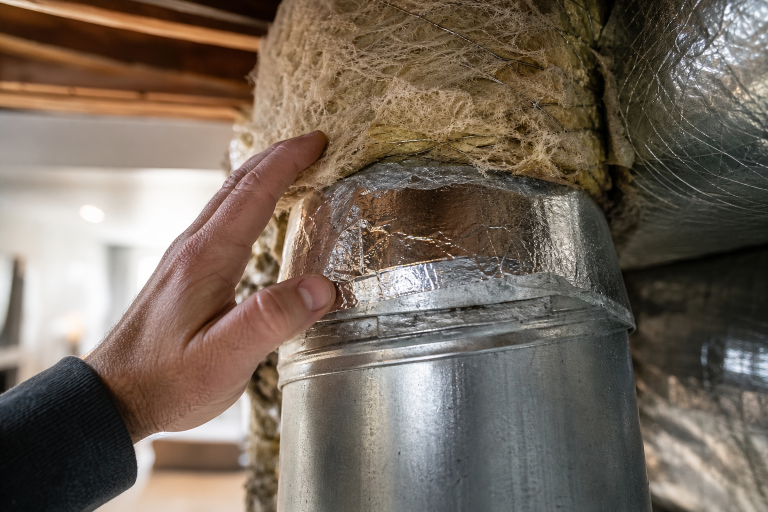
- Ducted systems: Often fit homes with central supply and return ducts that can be appropriately sealed, sized, and balanced. Most of the equipment stays outside living areas.
- Ductless systems: Can serve homes without ducts, additions, converted garages, or rooms that are difficult to condition through the central system. The indoor unit location and condensate drainage require careful planning.
- Dual-fuel systems: Pair a heat pump with a furnace or other backup heating source. Controls determine when the heat pump runs and when the backup source takes over.
Inspect Ductwork And Airflow
Existing ductwork may be reusable, but it should be inspected before selecting equipment. Look for disconnected joints, crushed flex duct, corrosion, inadequate insulation, leaks, and restrictive return ducts. Ducts located in attics, crawl spaces, garages, or other unconditioned areas deserve particular attention.
A larger heat pump does not automatically correct an airflow problem. If a bedroom stays cold because its supply duct is undersized or damaged, more capacity at the outdoor unit may not deliver more air to that room. Sealing, insulating, repairing, and balancing ducts can be part of the solution.
Request Proper System Sizing
Square footage is only one input in equipment selection. A room-by-room load calculation considers insulation, window area, air leakage, ceiling height, orientation, occupancy, and local design temperatures. Ask whether the contractor will use a recognized method such as Manual J.
Oversized equipment can cycle on and off too quickly, which may reduce comfort and moisture removal during the cooling season. Undersized equipment may struggle in demanding weather conditions. The goal is not the biggest available unit. It is a system matched to the home's calculated load and distribution capacity.
Review Electrical Capacity
Heat pump projects can require dedicated circuits, outdoor disconnects, wiring changes, or panel work. An electrician should review the service size, available breaker space, panel condition, selected equipment, and other major household loads, such as an electric vehicle charger, induction range, or heat pump water heater.
A panel upgrade is not automatic. It depends on a calculated electrical load and the equipment being installed. Confirm whether electrical permits, materials, inspections, and any panel modifications are included in the HVAC proposal or priced separately.
Compare Efficiency And Cold-Weather Performance
Compare multiple ratings when reviewing systems. SEER2 addresses seasonal cooling efficiency, while HSPF2 addresses seasonal heating efficiency. For colder regions, ask about heating capacity at low outdoor temperatures and whether backup heat is recommended for the home.
When evaluating models, proper sizing and cold-climate performance guidance can help homeowners focus on comfort, equipment capability, and installation quality rather than the highest rating alone. Utility costs, weatherization, thermostat use, and duct performance all influence real-world results.
Compare Complete Quotes
Request at least two detailed written proposals. A complete quote should identify the indoor and outdoor equipment, capacity, efficiency ratings, thermostat, refrigerant line work, drainage, duct repairs, electrical scope, permits, old-equipment removal, startup testing, warranties, and maintenance expectations.
Ask who will handle inspections, what happens if hidden issues are discovered, and whether commissioning is included. Commissioning should involve checking heating and cooling operation, airflow, drainage, electrical connections, and controls after installation.
Prepare For Installation
Installation typically includes protecting nearby surfaces, removing old equipment, setting new indoor and outdoor components, connecting ducts and lines, completing electrical work, configuring controls, and testing both operating modes. A straightforward replacement may be shorter than a project involving duct reconstruction, panel upgrades, structural work, or permit delays.
Protect Long-Term Comfort
After installation, follow the manufacturer's filter guidance, keep supply and return vents unobstructed, and keep leaves, grass, snow, and stored items away from outdoor equipment. Investigate unusual sounds, water leaks, weak airflow, or unexpected operating behavior promptly. Professional service can address coil condition, drainage, electrical components, refrigerant performance, and airflow when needed.
Final Checklist
- List the rooms and comfort issues that need to be addressed.
- Review insulation, windows, drafts, and air leakage.
- Inspect ducts, returns, sealing, insulation, and airflow paths.
- Request a room-by-room heating and cooling load calculation.
- Review electrical capacity before finalizing equipment.
- Compare ducted, ductless, and dual-fuel approaches.
- Get detailed proposals that include permits, testing, and warranty terms.
- Verify current local rebates, deadlines, and documentation requirements before signing.
A successful heat pump upgrade begins with a careful review of the entire home. Equipment matters, but the envelope, ductwork, electrical system, controls, and installation practices matter just as much. Thoughtful planning helps create steadier comfort through every season.


